Search This Blog

Saturday, October 15, 2011

FRIENDSHIP BISCUITS

Since making my Amish Friendship Bread starter and my initial bread, I have discovered a whole world of recipes that can be made from the starter. While I enjoy the original bread recipe, I certainly do not need all that sweetness on my body. So I've made corn bread, chocolate cake for a church meal and my kids' favorite--biscuits. These are sweeter than I prefer for a "normal" biscuit, but if you use a small cutter they can be a wonderful snack. They melt in your mouth kind of like a Mexican wedding cookie.

Michaela making biscuits

Friendship Biscuits

1 c. flour
1/2 tsp. baking soda
1 c. Amish Friendship Bread starter
2 tsp. baking powder
1/4 tsp. salt
1/4 cl butter, melted

Preheat oven to 450. In a bowl combine dry ingredients. Add wet ingredients and mix well. Place dough on a well-floured surface and flatten with your hands to 1" thickness. Cut out biscuits with a floured cutter and place on a baking stone or greased cookie sheet. Bake 10 minutes or until golden.

Monday, September 19, 2011

Amish Friendship Bread

It feels very much like Fall here in Upstate SC. That makes me think of baked goods, cinnamon and nutmeg, hot tea or hazelnut coffee, yummy smelling candles and snuggling up in a blanket in my rocking chair. I've pulled out a recipe from an old church cook book to fulfill some of those cravings. I hope you enjoy it, too!


Amish Friendship Bread
Courtesy of Ladies of Cornerstone Bible Fellowship, Mesa, AZ

Starter:
Mix 1 pkg. dry yeast, 2 c. flour, 2 c. milk and 2 c. sugar. Let sit overnight, uncovered, in a warm place. Put half in a gallon zipper bag as Day 1 Starter, use rest as Day 10 recipe. It's very helpful to write the Day 1 date on your bag and have a calendar handy with instructions for each day.

Day 1: do nothing.

Days 2, 3, 4, 5: Mush the bag several times each day.

Day 6: Add 1 c. each of sugar, flour and milk, mushing bag. It may be lumpy.

Days 7, 8, 9: Mush bag several times each day.

Day 10: Add 1 c. each of sugar, flour and milk. Stir and pour out 4-one cup starters into gallon zipper bags. Give away 3, keep 1 for your own starter as Day 1. Remember to write the date on the bags you give away and include instructions.

I keep my starter bag in a bowl on my countertop
Recipe:
Mix together in large bowl, along with remaining starter from bag:
1 c. vegetable oil
1/2 c. milk
3 eggs
1 tsp. vanilla
Add:
2 c. flour
1 c. sugar
1/2 tsp. baking powder
2 tsp. cinnamon
1 tsp. nutmeg
1/2 tsp. salt
1/2 tsp. baking soda
1 c. chopped pecans, optional
1 lg. vanilla instant pudding

Mix thoroughly. Pour into 2 lg. greased and sugared loaf pans, or 4 sm. ones. You can also sprinkle cinnamon and/or nutmeg into pans. Fill pans only 2/3 full. Bake 325 degrees for 1 1/2 hours. Variations: Use other flavors instant pudding--it does change the flavor. Substitute applesauce, mashed bananas or yogurt for oil. Add orange zest or change the spices and nuts to your liking.

Thursday, September 8, 2011

CHICKENS!

Michaela handfeeding Big Mama
I kind of feel like I've been running around headless after a yard full of chickens lately. Wait a minute, I have been running around after a yard full of chickens lately...now, where did I put my head? Hmmmm....

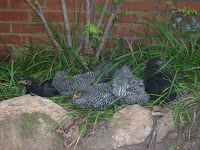
We have "adopted" 9 Plymouth Rock hens and 2 roosters. Plus we have our neighbor's rooster and 2 hens at our house for most of the daylight hours, too. They're free range, but we are trying to teach them some boundaries, such as, not running into the road to live out the ages old joke, stay off of the main walking areas so that our shoes can remain poop-free at least in one spot, etc. We read online that you can train them by squirting them with a water bottle. It was effective as well as quite hilarious at first, but now they are not quite so alarmed by a squirt to their fuzzy fat bottoms.

My Darling John is in the process of building a set of nesting boxes and roosting spot so that we can have some control of them in the dusk and dawn times. Right now we have to stand out in the yard with squirt bottles to get them to roost in the tree by our house and not in our neighbor's yard. Then we have to "get up with the chickens" (aka before the sun is even awake!) so that they won't wander into said neighbor's yard and eat all the feed she's put out for her brood before we can feed ours in our own yard. Having them confined in the evening and morning will do so much for my attitude!

I do love watching them peck around the yard after bugs, though. They are fascinating creatures. I've learned where the term "pecking order" came from, but I've yet to find their hiding places for all the eggs that I have been anticipating. That will be another wonderful reason to have them confined part of each day.

I'll introduce you to our flock now.

Our babies--Chickadee, Chick, Fil-A, Baldy and Ranger


Goldie and Bobette


Scarlett and Susan

Tuesday, August 9, 2011

Kendra's Easy Yummy Biscuit Recipe

My oldest daughter Kendra is usually the biscuit-maker in our family. But now the job has fallen to me since she is spending a year on the mission field with her grandparents in Arizona.

Kendra and I use the same recipe, but we have different techniques. She likes drop biscuits, I like cut-out biscuits. Either way, these are super simple and scrumptious. We're having them for supper tonight to accompany our bean soup. They're also great with cream gravy or just butter.


KENDRA'S EASY YUMMY BISCUIT RECIPE

2 c. self-rising flour
1 stick softened butter or margarine
1 c. milk

Preheat oven to 450. Sift flour into a medium bowl. Using a pastry blender, cut butter into flour until you have small pieces of butter throughout the flour.


Pour milk in and blend with a spoon just until everything is moistened. Dust flat surface with additional flour and place dough on top of flour. Carefully turn dough over in flour so that it is floured evenly around the whole ball. Without handling the dough too much, flatten with hands until it is 2" thick.


Flour your biscuit cutter (if you don't have one you can use a cleaned-out can or a glass) and cut out biscuits.


 Place on a greased cookie sheet or seasoned baking stone. Bake 10-12 minutes or until just golden on top.

*Variation: try adding some dried herbs or shredded cheese or bacon bits to the batter.


MY BISCUIT CUTTER
I bought this biscuit cutter from an antique store here in Greenville. My mom has one that is very similar that we used when I was growing up for making biscuits. The fun thing about this particular type is that it has a round attachment to turn it into a doughnut cutter!


Monday, August 1, 2011

Scrap Yarn Projects

My Favorite Lap Blanket
I have been trying to use up my vast stashes of leftover yarn this summer. Here is a sampling of projects made from acrylic yarn.
Mr. Turtle

Basket of Toys
Rainbow Fish
Teether

Sssssscrappy Ssssssnakes


Ball

My "Tucson" Sofa Blanket
Hubby's Sofa Blanket
Daughter's Stained Glass Blanket

Monday, July 25, 2011

Farmer's Breakfast

Don't you love farmer's markets and roadside vegetable stands in the summer? Here's a way to use up some of that fresh produce for breakfast.

1/4 c. sliced onions
1/4 c. sliced bell pepper
 1 c. sliced fresh mushrooms
3 Tb. butter
3 c. diced potatoes
9 eggs, beaten
1/4 tsp. pepper
3 Tb. milk
2 c. shredded cheese
1 1/2 c. diced, fully-cooked ham
1/4 c. chopped tomato
Fresh basil leaves

In heavy skillet on medium heat, sautee onions, peppers and mushrooms in butter until tender. Add potatoes. Cook, covered, until tender. Combine eggs and milk with pepper. Stir into potato mixture. Add ham and 1 c. cheese and cook, uncovered, until eggs are almost set, pushing cooked portions to center. Add remaining cheese and cook, covered, until melted. Serve with a garnish of tomato and basil leaves.

Serves: 6

Thursday, July 21, 2011

Scrappy Rags

My husband recently gave me shelves to get my craft room organized. During the organizational process I discovered that I have way too much yarn! Not necessarily a problem, in my estimation, but it has inspired me to come up with ways to use it up before I buy more yarn (a tough situation for me). I've made turtles, lap afghans, fish, rugs, shopping bags, dishcloths, etc. One of my favorite so far has been the Scrappy Rags. Here's the pattern!

SCRAPPY RAGS

This pattern is great for reinforcing your increase/decrease knowledge!

Make a yarn ball by cutting ww cotton yarn into 10"-15" lengths and knotting them together. Continue until you have a ball about the size of a softball.

Using an "H" hook ch 2
- sc in second ch from hook, turn
- ch 1, 3 sc in same st, turn
-  ch 1, inc (2 sc) in first st, sc in next st, inc in last st, turn
- ch 1, inc in first st, sc in each st to last st, inc in last st, turn
- rpt last row until you have 35 sc then sc one row even (no increases), turn
- ch 1, dec over first 2 st (insert hook into first st and bring up a loop, insert hook into next st and bring up a loop, y/o and draw through all three loops), sc in each st to last 2 st, dec over last 2 st, turn
- rpt last row until you have 3 sc then dec over 3 sc, turn
- sc evenly around all edges putting 3 sc in ea corner, f/o
You may use this pattern for selling items so long as you credit me as the pattern creator.